

In this chapter of Zelda TOTK we meet with Tulin of Rito Village, who is a young Rito warrior with a strong sense of duty to his village. You’ll first encounter him near the village’s entrance, where he can be found practicing with his bow and arrows. Approach Tulin of Rito Village, and he will share with you his concern about the recent disappearance of several Rito warriors. Tulin is determined to uncover the truth and asks for your assistance in solving this mystery.
SEE ALSO
| PREVIOUS QUEST: Impa and the Geoglyphs | NEXT QUEST: The Wind Temple |
TULIN OF RITO VILLAGE IN TOTK ZELDA
Make your way to the top of Rito Village in order to find Tulin. A scene will trigger. We will also meet up with both Teba and Saki. They are worried about the current snow blizzard.
We now need to proceed across the abyss below and towards the two campfires in the distance. We can do this by starting from a good height distance and then using the glider.
Once we arrive at the campfires we will meet up with Nekk, who will point out a new Skyview Tower for us. We will also discover that this rather small village is known as the Hebra Trailhead Lodge.
Head inside the lodge and speak with Harth. Who will tell us that we can find Tulin on a trip to find food. Our next destination is over at the Hebra South Summit Cave.

THE SEARCH FOR TULIN
Begin by climbing up the set of ladders next to the ‘Hebra Mountain’ signpost. To the left is a set of rocks that we can climb up. The Rospro Pass Skyview Tower is up there.
Once you reach it you will quickly find out that it is surrounded by a series of thorns. Touching them will likely cause damage, so use Fire arrows instead. We can also throw a Bomb Flower into the mix too, to make quick work of the thorns.
Keep following the snowy mountains north and we will come across more Keese bats. These ones are frozen, just like the rest of the environment. So if you end up taken damage from them you will likely turn to ice yourself. So wiggle yourself free, if this does indeed happen.
Once at the top of the mountains we will find our path now goes in two different directions. Continuing north will lead us to Veria and the ‘Crossing the Cold Pool’ side quest. Meanwhile heading west will take us to our main story objective.
HEBRA SOUTH SUMMIT CAVE
Here we will see a large bonfire outside of the Hebra South Summit Cave. Here we can find Laissa, who will inform us that Tulin is further inside the cave.
The rest of the cave entrance is surrounded with thorns. Again use Flower Bombs or Fire arrows to deal with them and move on.

In this next area there will be a wind gust and a small section of ice on the ground. If we break this ice patch it will lead to a pond full of fish, such as the Chillfin Trout and Glowing Cave Fish. Also in this small cave area we can find other materials too, including; Chillshrooms, Brightcaps, Flint and Amber. To get back out again just climb up the walls.
Once we arrive back at the wind gusts, simply jump and equip the glider. Using the ‘X’ button on the controller. We can then proceed and ride the gusts up to the top.

In this next area we will come across a Horriblin. A new creature species and enemy target. They tend to climb and run across the cave walls. They can also throw rocks around to cause and inflict damage.
Moving on from the Horriblin and we will find, what seems like a dead end. We are on a small section of land that is surrounded by water. On this bit of land is a bundle of wood.
Use a flint and ignite the wood to create a campfire. From there use a pine cone to form a gust of wind that we can ride up with the help of our glider. There are pine cones inside the small barrels here, should you need to use them.
Here we have yet more thorns to deal with. We can also find a Bubbulfrog here too. Which can drop Bubbul Gems. Keep climbing up the various walls and avoiding yet more thorns.
Continue on and we will encounter Gesane. Proceed and exit the cave.
CHASING DOWN TULIN
Exit the cave and continue to climb up the mountains. We will run into a Bokoblin camp along with one of its leaders. You will find Tulin at the highest point of the mountain. Speak with him.

Speak with Tulin and we will find out that the nearby flying monster managed to steal his bow. We will now learn about Tulin’s Power of Wind.
So jump off the cliff and use his ‘gust ability’ to glide on over, towards the flying creature. Unfortunately the ability has a charge limit, so once used you will need to wait in order to activate it once again.
Land on the middle platform here and use your bow to aim at the creature. If you happen to run out of arrows, then the nearby crates will help stock you up.
Once you agree to help Tulin, he will join your party, making him an invaluable ally in your quest. Tulin possesses exceptional archery skills and can provide support from a distance during combat. His mastery of the wind also allows him to create updrafts, enabling you to reach otherwise inaccessible areas.
THE SKY ISLANDS
After the scene and once Tulin gets his bow back we will then need to head for the Sky Islands. But first make your way north east of your current location. East of Hebra East Summit. Here we will find the Pikida Stonegrave Skyview Tower. Use the Tower to make your way towards the floating islands

Make sure to bring plenty of Stamina items as you will need them. Our task is to ascend the floating islands. We can use the Pikida Skytower to help get us closer to the floating islands and from there we continue to ascend.
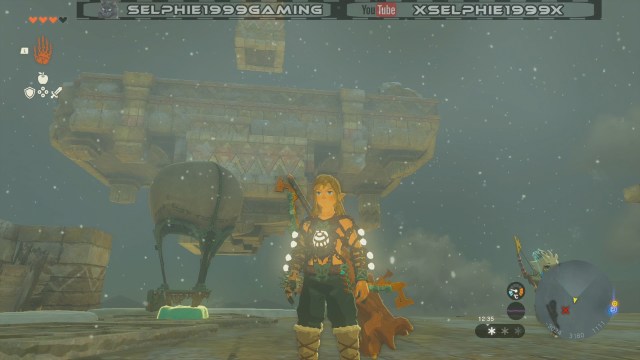
There will then be a scene involving a strange voice from the skies and a ship. Continue the ascend and we will also find our next shrine, Mayaumekis.
Destroy the ice patch on the ground, just outside of the Mayaumekis shrine. Here there will be a treasure chest (Arrow x5). Jump and glide to the next platform. Defeat the enemy sentry.

As you make your ascend up into the skies and bouncing your way across the various ships, we will eventually come across a set of blocks. A pillar stands high above. Use these blocks to create a platform for us to climb so we can reach this pillar.
Once at the top (it will only take us half way) we will find another treasure chest (Portable Pot x3). On this rather tall pillar here there will be a series of ice spikes on the side of it. We can actually cling to that ledge and use Ascend to reach the rest of the way. We will now officially be at the very top of this tall pillar

Glide on over towards the lights and stone arch. Defeat the enemy sentries. Glide over to the next island, where there is an ice patch. Destroy the ice to find a ship underneath it. Head towards this series of islands. There will be another ice pool and a ship. We want to continue north.
Here there will be another pool, this time it does not contain ice. Instead it contains rocks and boulders. Destroy them so that the ship below it is accessible. A Bomb Flower should do the trick.
From there search for a square platform with ice around it. There are also ice shards here. Destroy them and we can get inside this platform to find a

Treasure chest (Arrow x10), alongside several crates full of even more arrows and Chillshrooms. Now head to the east of here, to another ship underneath an ice pool. We want to make our way over to the islands above and to another bouncing ship. Here there will also be two flying enemy targets.
Inside this small sheltered area is a cooking pot or stove that we can use should you need to create more meals or rest. There is also a small pool full of fish, such as the Chillfin Trout.
Continue on and cross the next set of ruins, towards several enemy constructs, who appear to be fighting some of the flying species. Deal with them and head across the bridge. Warning as you try to cross, the platform will begin to crumble and give way.

We will come across even more enemy constructs as we continue on to the next piece of floating land. Ascend the staircase to find several air balloons.
Now we could try to avoiding using these balloons and just lob a few acorns at a lit fire. However, chances are it won’t be enough.
So, instead, go ahead and construct one of these balloons onto a platform. Then create a fire using Flint and ride it to the top. Glide to the next platform
Once you reach the next platform, go ahead and use the Ascend ability to reach the top of the pillar above. Once at the top you will notice several ships. Two of which seem to be going in circles around the area. Our destination is over to the north, towards the next ice pool
Destroy the ice to find another ship underneath it. Jump the ship to the platform above, where we can find the Kahatanaum Shrine. Warning the ice and cold elements here will start to impact your health.
Head up the stairs and glide on over to the next island.

We will now come across a series of floating ships that are all circling the large wind storm. Follow these ships around until you find a staircase leading to a boat. Be careful not to go the wrong way, against the strong gusts from the storm.
Once you reach the stairs head up them and jump onto the ship and into the eye of the storm. This concludes the TOTK Zelda on the section of Tulin of Rito Village as we make our way to the Wind Temple.
Has been playing video games for her entire life so far. Grew up with the Sega Master System II. Her favourite games include both Resident Evil 2 (OG) and Final Fantasy VIII.
She now writes articles about video games.
- FNAF Secret Of The Mimic – Parachute Ending Walkthrough - 6th August 2025
- FNAF Secret Of The Mimic – White Tiger Tunnels Walkthrough - 3rd August 2025
- FNAF Secret Of The Mimic – Admin Wing Walkthrough - 3rd August 2025